
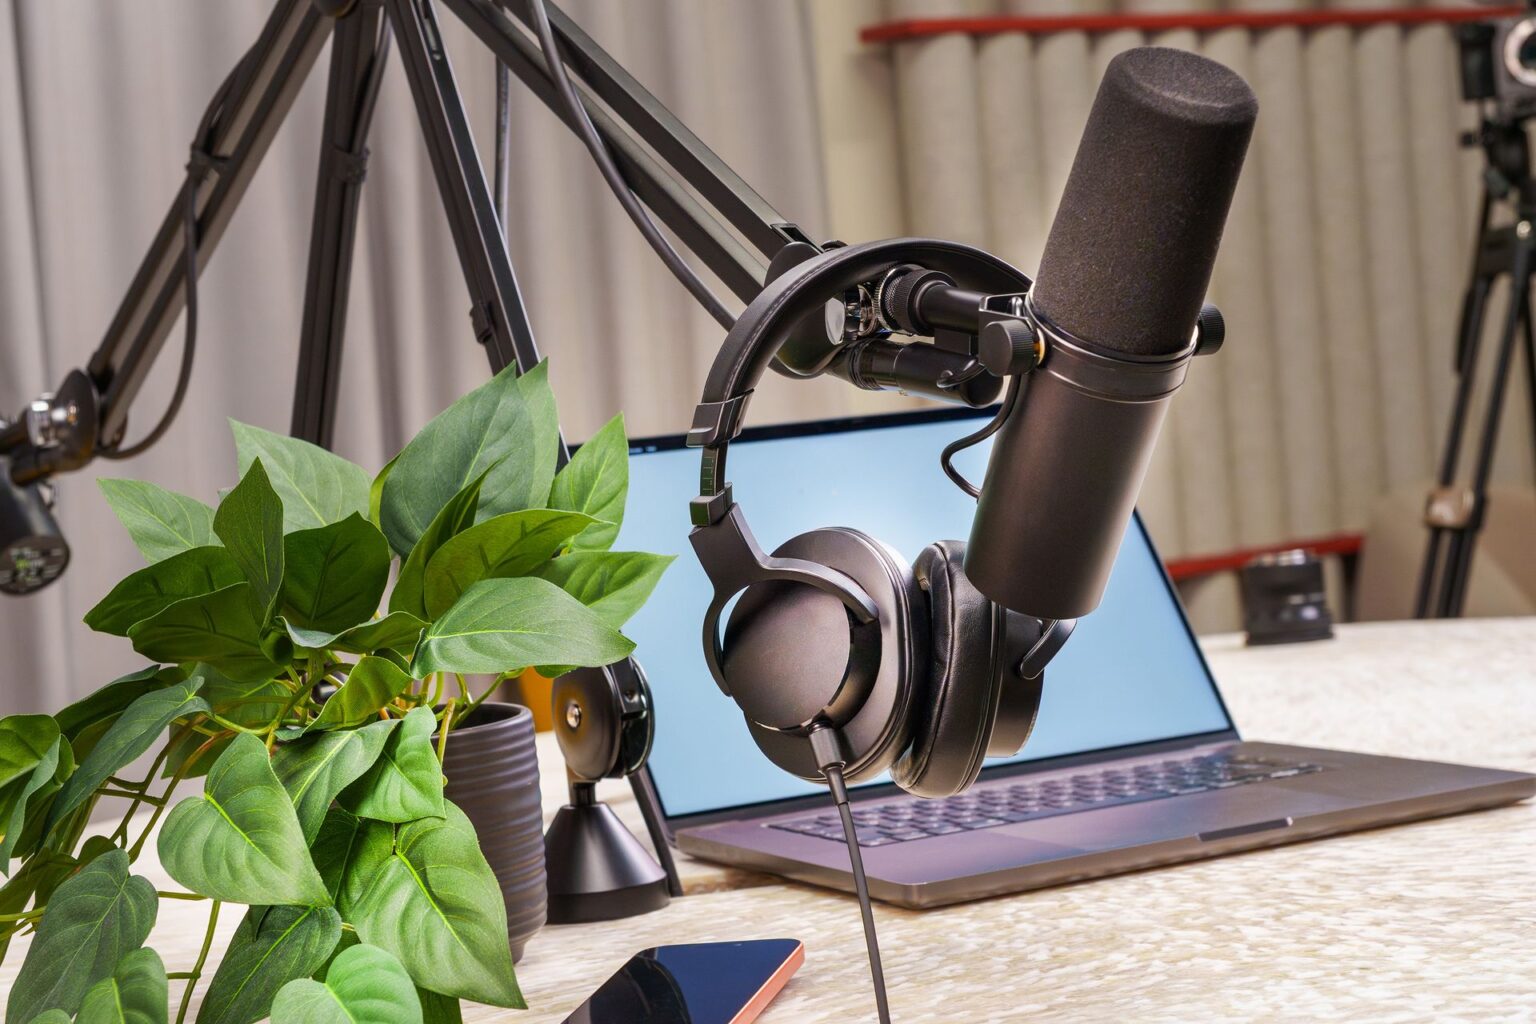
Starting a podcast no longer requires a professional studio or a thousand-dollar investment. In 2026, social media influencers and aspiring podcasters can launch a high‑quality show with a simple, affordable setup under $200.
If you already create content on Instagram, TikTok, YouTube, or X, podcasting is the next smart step to build authority, deepen audience trust, and unlock new monetization streams.
This guide breaks down exactly what you need — nothing more, nothing unnecessary — and shows you how to build a clean, professional podcast setup on a beginner budget.
What You Actually Need to Start a Podcast

Many beginners overcomplicate podcasting. In reality, you only need four essentials:
- A good microphone
- Closed-back headphones
- Free recording software
- A quiet recording space
That’s it.
You do NOT need:
- A professional mixer
- Expensive acoustic panels
- A $400 microphone
- A full studio
Let’s build your setup smartly.
Step 1: Choose the Right Budget Microphone (Under $100)
Your microphone is the most important investment. Audio quality determines whether listeners stay or leave.
For beginners and influencers recording at home, dynamic USB microphones are the best option because they reduce background noise and don’t require extra equipment.
🥇 Best Overall: Samson Q2U
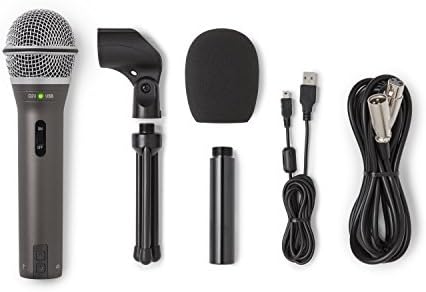
- Dynamic handheld microphone with XLR and USB-C
- Plugs directly into any computer with a USB-C interface
- Includes Tripod Desktop Stand, Tripod Extension, Mic Clip, Windscreen, USB-C Cable and XLR Cable
Why it’s perfect for beginners:
- USB + XLR dual output (future upgrade ready)
- Excellent noise rejection
- Clear, warm vocal tone
- Under $80
This mic works great in untreated rooms, apartments, or shared spaces.
✅ Ideal for influencers recording from home.
🥈 Best Flexible Option: Audio-Technica ATR1100x

- All-purpose mic tuned for clear audio reproduction
- Ideal for use with karaoke machines, computers, and PA systems, and in other vocal and instrument applications. Has conv...
- Focused pickup (unidirectional polar pattern) helps prevent feedback
- Clean, professional vocal sound
- USB-C compatibility
- Durable build
- Great long-term investment
If you plan to upgrade to an audio interface later, this mic grows with you.
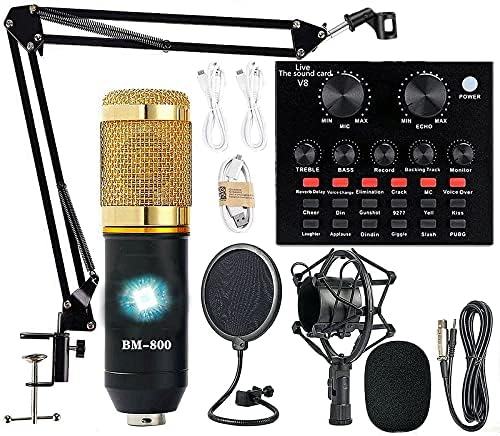
🥉 Ultra Budget Pick: Fifine K669B

- [Authentic Sound Integrity] Experience natural sound reproduction with the podcast microphone with boom arm to preserve ...
- [Flexible Connectivity Options] Equipped with both USB and XLR connections, recording studio microphone kit offers versa...
- [Robust Boom Arm Support] Crafted from durable metal, the boom arm microphone stand ensure secure placement of the XLR/U...
- Plug-and-play USB
- Very affordable
- Easy setup for total beginners
Best for creators testing podcasting before committing long-term.
💡 Pro Tip for Influencers:
If you record in a normal bedroom or office, choose a dynamic microphone (like the Q2U). Avoid condenser mics in untreated spaces — they pick up everything.
Step 2: Budget Headphones for Monitoring (Under $50)
Headphones prevent echo and help you hear audio issues immediately.
Best Budget Options:
✅ Audio-Technica ATH-M20x
✅ Sony MDR-ZX110
Look for:
- Closed-back design
- Comfortable ear cushions
- Clear vocal monitoring
Avoid Bluetooth headphones when recording — wired is more reliable.
Step 3: Free Podcast Recording Software
You don’t need paid software at the beginning.
Best Free Options:
Audacity (Windows/Mac)
- Free
- Simple editing
- Beginner-friendly
GarageBand (Mac Users)
- Clean interface
- Great audio presets
Riverside or Zoom (For Remote Interviews)
- Easy guest recording
- Simple workflow
Keep it simple. Focus on content first.
Step 4: Create a Podcast Studio at Home for Free
Here’s the secret most beginners don’t know:
You can dramatically improve sound without spending money.
Easy Acoustic Hacks:
- Record in a closet (clothes absorb sound)
- Use curtains and carpets
- Turn off AC and fans
- Record at night for less outside noise
- Place mic 6 inches from your mouth
Good positioning beats expensive gear.
Sample Full Podcast Setup Under $200
Here’s a realistic breakdown:
| Item | Product | Approx. Price |
|---|---|---|
| Microphone | Samson Q2U | $70 |
| Headphones | ATH-M20x | $50 |
| Boom Arm | Budget Arm | $25 |
| Pop Filter | Basic | $10 |
| Total | ~$155 |
This leaves room in your budget for hosting or upgrades.
Yes — you can start professionally for under $200.
USB vs XLR for Beginners: Quick Decision Guide
If you're new:
👉 Choose USB.
Why?
- No audio interface required
- Plug directly into your laptop
- Easy setup
- Lower cost
Choose XLR only if:
- You plan a professional multi-mic studio
- You understand gain staging
- You want advanced audio control
For 90% of influencers, USB is perfect.
Common Beginner Podcast Mistakes to Avoid
1. Buying the Wrong Mic
Condenser mics in noisy rooms = regret.
2. Ignoring Mic Position
Distance and angle matter more than price.
3. Over-Editing Audio
Heavy compression and effects can make voices unnatural.
4. Waiting for “Perfect Gear”
Your content builds your audience — not your equipment.
Is a $200 Setup Enough to Grow a Podcast?
Absolutely.
Many successful creators started with:
- USB microphones
- Bedroom setups
- Free software
Podcast growth depends on:
- Consistency
- Valuable content
- Clear audio
- Strong branding
You can upgrade later once your show generates revenue.
Start lean. Upgrade smart.
✅ FAQ
Can I start a podcast with under $200?
Yes. A beginner podcast setup under $200 can include a USB dynamic microphone, closed-back headphones, and basic accessories. This is enough for professional-quality audio when recorded in a quiet room.
What is the best microphone for a beginner podcaster?
The best beginner microphone under $100 is the Samson Q2U because it offers USB and XLR outputs, strong background noise rejection, and easy plug‑and‑play setup.
Do I need an audio interface to start a podcast?
No. If you use a USB microphone, you do not need an audio interface. USB microphones connect directly to your computer and are ideal for beginners.
Is USB or XLR better for beginners?
USB microphones are better for beginners because they are simpler, cheaper, and require no additional equipment. XLR is better for advanced setups.
How can I make my podcast sound professional at home?
To sound professional:
- Use a dynamic microphone
- Record in a soft, quiet room
- Position the mic correctly
- Edit lightly
- Monitor with headphones